
I had occasion to practice making moulded chocolates for a birthday party. It was a lot of work for the occasion, but was good practice. My previous attempt at making these chocolates was less than successful. The chocolate was tempered, but lost its temper either because of the instructions I followed to warm the mould, or to refrigerate to help set the shell, made worse when I had to rewarm it in the mould when it set too much.
This time I didn't bother warming the mould. I let the chocolate sit in it for a few minutes before pouring it out. This is the part that takes some faith, pour it out too soon and the shells are too thin, too late and the whole thing sets and won't pour out. General advice is to give it a couple minutes, and while the shells seemed thin at that point I went with it and they worked out. I put the moulds in the refrigerator to let the shells firm up before adding the filling, but was careful to only allow a couple minutes for that too so they wouldn't cool too fast and form the wrong kind of crystals.
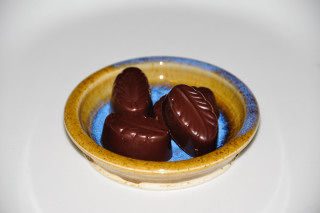
I used a ganache filling I had left over from my previous experiment and kept in the fridge. Just a small amount of reheating was sufficient to bring it up to temperature and fluidity. I wanted it fairly fluid so it would form a flat surface in the moulds, but not so warm it would de-temper the shells. After that it's just a matter of disciplining myself not to over-fill the shells (I overstuff everything - sandwiches, turkeys, whatever and tend to have filling go everywhere). I put them in the fridge for a couple more minutes to set the top of the filling, then put on the cap layer. Then I left it at room temperature overnight. The next morning they came out of the moulds fairly easily, and - yay! - hadn't lost their temper and bloomed.
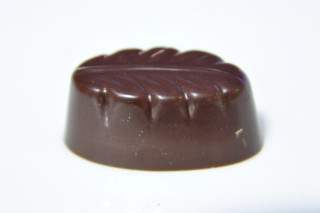
The closeup photo on the left shows now nicely they can come up. The camera does pick up flaws that aren't really noticeable in person. One is a small amount of smudging from fingerprints, even though I tried to handle them only quickly in order not to soften the surface with body heat. I definitely need to get cotton gloves or something. There are also visible some flaws from the mould not being perfectly prepared. I'm still learning how to maintain moulds properly, and how to polish the cavities properly before use.
While this experiment with chocolate moulding was much more successful than in the past, I still feel I need practical instruction, not just books and experimentation. I signed up for a 3-day course in May. I hope to gain a better feel for things from that. I expect I'll post more about my practicing after that.
Comments